rate-limit package powered by @upstash/ratelimit, a connectionless (HTTP-based) rate limiting library designed specifically for serverless and edge environments.
Setting up
Rate limiting is enabled for theweb package contact form automatically by the existence of a UPSTASH_REDIS_REST_URL and UPSTASH_REDIS_REST_TOKEN environment variable. If enabled, the contact form will limit the number of requests to 1 per day per IP address.
To get your environment variables, you can sign up at Upstash Console and create a Redis KV database. You can then find the REST URL and REST token in the database details page.
You can then paste these environment variables each of the environment variables files.
Adding rate limiting
You can add rate limiting to your API routes by using thecreateRateLimiter function. For example, to limit the number of AI requests to 10 per 10 seconds per IP address, you can do something like this:
apps/app/api/chat/route.ts
Configuration
Therate-limit package connects to an Upstash Redis database and automatically limits the number of requests to your API routes.
The default rate limiting configuration allows 10 requests per 10 seconds per identifier. @upstash/ratelimit also has other rate limiting algorithms such as:
- Fixed Window
- Sliding Window
- Token Bucket
packages/rate-limit/index.ts
Usage
You can use rate limiting in any API Route by importing it from therate-limit package. For example:
apps/api/app/ratelimit/upstash/route.ts
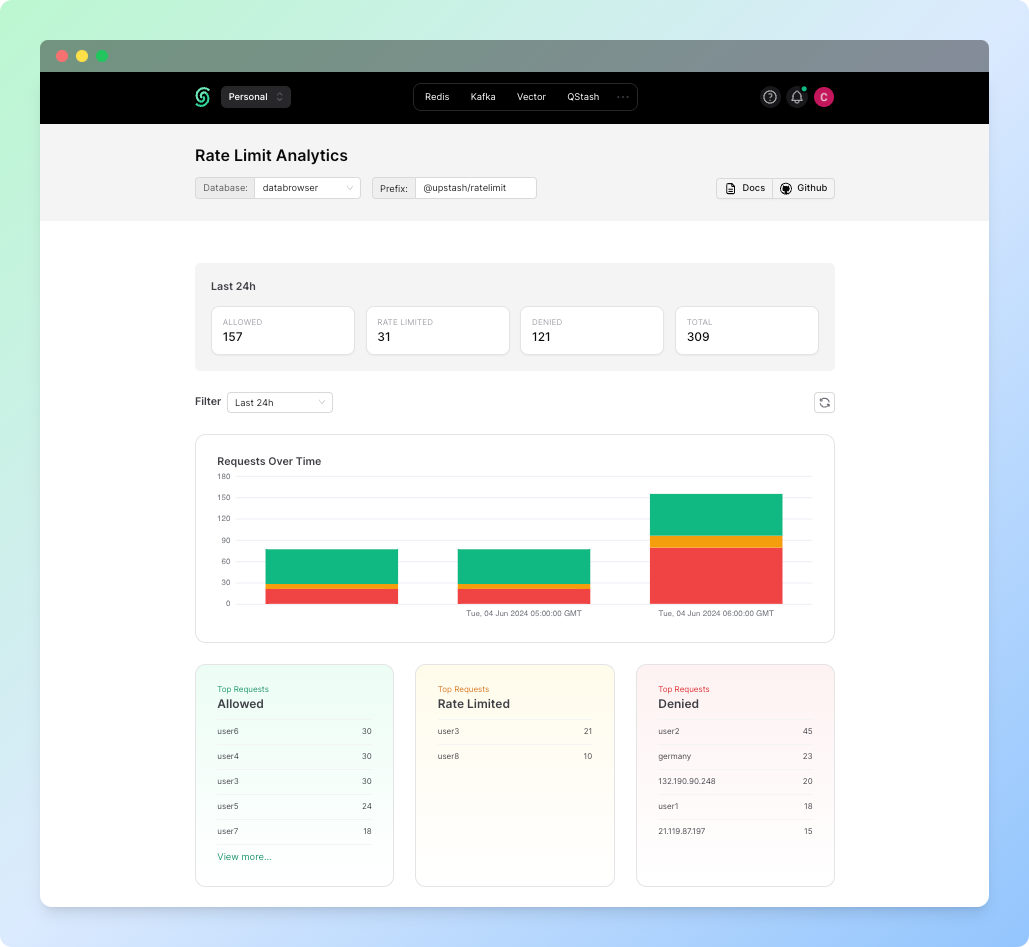
Analytics
Upstash Ratelimit provides built-in analytics capabilities through the dashboard on Upstash Console. When enabled, Upstash collects information about:- Hourly request patterns
- Identifier usage
- Success and failure rates
analytics configuration to rate limit client:
packages/security/index.ts
Dashboard
If the analytics is enabled, you can find information about how many requests were made with which identifiers and how many of the requests were blocked from the Rate Limit dashboard in Upstash Console. To find to the dashboard, simply click the three dots and choose the Rate Limit Analytics tab: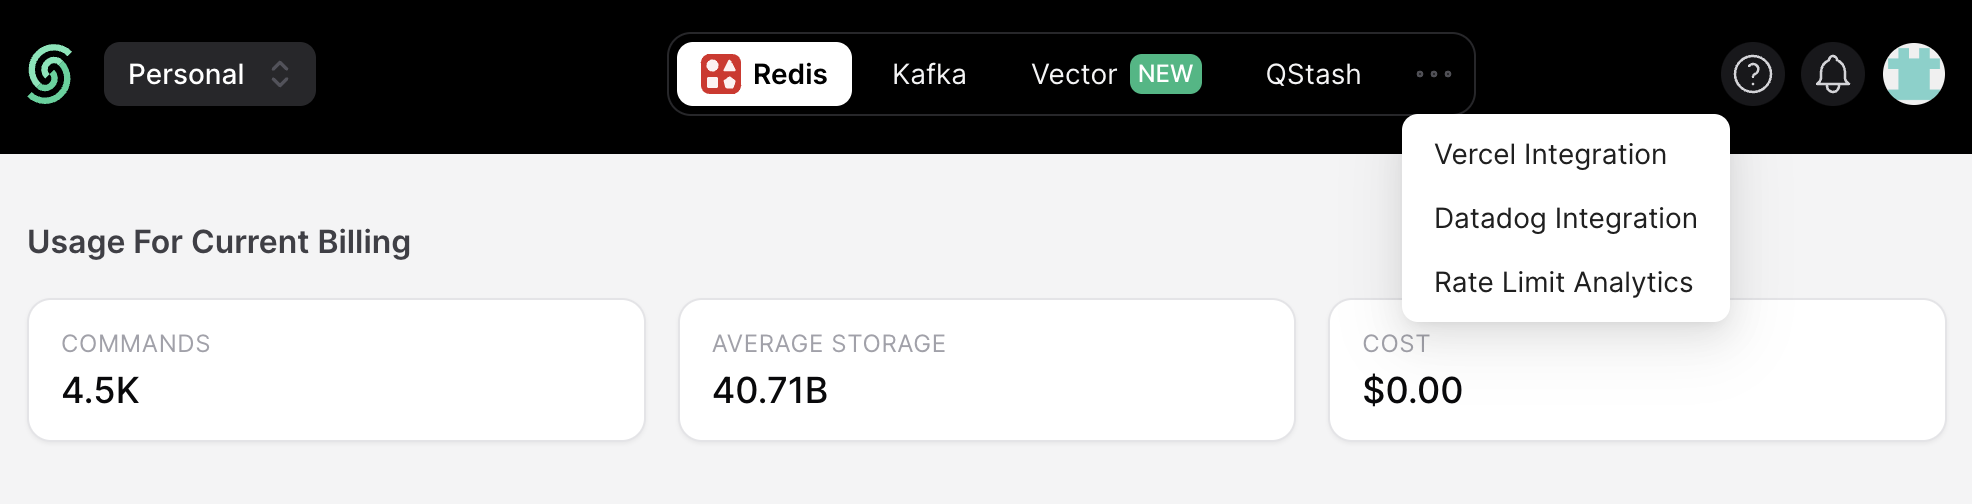
Best Practices
Choose Appropriate Identifiers
Use meaningful identifiers for rate limiting like:
- User IDs for authenticated requests
- API keys for external integrations
- IP addresses for public endpoints
Configure Rate Limits
Consider your application’s requirements and resources when setting limits. Start conservative and adjust based on usage patterns.
Implement Error Handling
Always return appropriate error responses when rate limits are exceeded. Include information about when the limit will reset if possible.
Further Information
@upstash/ratelimit also provides several advanced features:
- Caching: Use in-memory caching to reduce Redis calls for blocked identifiers
- Custom Timeouts: Configure request timeout behavior
- Multiple Limits: Apply different rate limits based on user tiers
- Custom Rates: Adjust rate limiting based on batch sizes or request weight
- Multi-Region Support: Distribute rate limiting across multiple Redis instances for global applications